Repair ink absorber full error on Canon MG6600 series, support code 5B00, 5B01, 1700, 1701
Every time the printer is turned on or will start printing, or every time it is done cleaning or deep cleaning, it will produce waste ink that is collected in the main waste ink absorber. Until one day, the main waste ink absorber was full and an error occurred: Ink absorber full, support code: 5B00, 5B01, 1700, 1701.
The solution below is for Canon MG6600 series
Canon MG6600, MG6610, MG6620, MG6640, MG6650, MG6660, MG6670, MG6680.
Table of contents
1. Problem Description
2. Solution
3. Parts
4. Questions and Answers
2. Solution
3. Parts
4. Questions and Answers
1. Problem Description
1a. Operator Call Error (indicated by the Alarm LED lights up orange)
1b. Service Call Error (indicated by the Alarm and Power LEDs flashing alternately)
Enter Service Mode
- Error: Ink absorber is almost full
- Support code 1700: Main ink absorber is almost full (Overseas)
- Support code 1701: Main ink absorber is almost full (Japan)
- Support code 1712: Platen Home ink absorber is almost full (Overseas)
- Support code 1713: Platen Home ink absorber is almost full (Japan)
- Support code 1714: Platen Away ink absorber is almost full (Overseas)
- Support code 1715: Platen Away ink absorber is almost full (Japan)
- Check points & solutions: Replace the waste ink absorber and reset its counter. Press the OK button to exit the error and allow printing without replacing the waste ink absorber. However, when the waste ink absorber becomes full, printing cannot be performed unless the corresponding waste ink pad is replaced.
- Cycles of LED blinking: 7 times
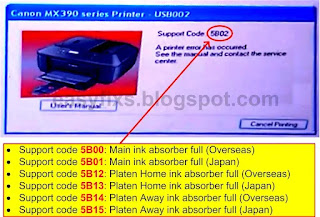
- Error: Ink absorber full
- Support code 5B00: Main ink absorber full (Overseas)
- Support code 5B01: Main ink absorber full (Japan)
- Support code 5B12: Platen Home ink absorber full (Overseas)
- Support code 5B13: Platen Home ink absorber full (Japan)
- Support code 5B14: Platen Away ink absorber full (Overseas)
- Support code 5B15: Platen Away ink absorber full (Japan)
- Check points & solutions: Replace the ink absorber and reset the waste ink counter.
Note
There are two ink absorbers on the Canon MG6600 series, namely the Main ink absorber and the Platen ink absorber. There are two types of platen ink absorbers, namely the Platen home ink absorber and Platen away ink absorber.
2. Solution
2a. Replace the ink absorber
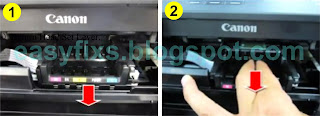
1. Turn on the printer power, open the operation panel unit, and remove the ink cartridge.
2. Press and hold the Stop button for more than two seconds until the print head holder turns to the replacement position.
3. Pull the print head locking lever and take out the print head.
4. Remove the power supply unit. Look at the bottom of the printer, release the two claws, pull out the power supply unit, disconnect the power cord connector, and then remove the power supply unit.
5. Remove the right side cover. Release the claws in the red circle and separate the right side cover. While holding the operation panel upwards, push down the side cover.
6. Remove the left side cover. Release the claws in the red circle and separate the left side cover. While holding the operation panel upward, push the side cover downward.
7. Remove the left front panel. Disconnect the wire of the card board and remove the screws first. Release the claws in the red circle and pull outward to separate the left front panel.
8. Remove the operation panel unit and the operation panel cover. Disconnect the operation panel wire on the logic board assembly, and connect the blind plate on the middle frame.
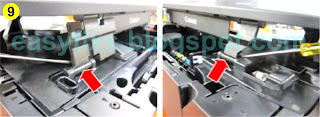
9. While pressing down the fixed claw on the back of the front link, slide and release the two front links of the operation panel unit.
10. Disconnect the two rear links and remove the operation panel unit.
11. Remove the front door unit and the cassette unit. Remove the screws (two each) on the right cassette guide and the left cassette guide, and separate the guides.
12. Separate the front door unit and the carton unit.
13. Disconnect the front connection FFC and output tray sensor wires on the relay board, and then release the scanner FFC on the logic board assembly.
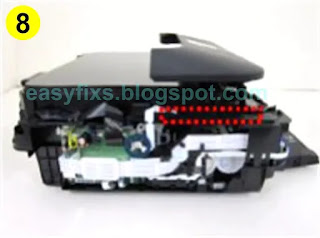
14. Remove the scanner unit. Remove the front left screw. Release the claws (the three claws in the red circle below) on the front right and the right and back left, and then separate the scanner unit and printer.
15. Remove the main waste ink pad kit. Disconnect the black and color waste ink tubes, remove the two screws, and separate the cover, and then take out the main waste ink pad kit.
16. Remove the gear unit. Release the springs and hooks on both sides of the gear unit, and separate the gear unit.
17. Remove the pressure plate unit and the upper pressure plate waste ink pad. Release the claws, and separate the pressure plate unit and the upper pressure plate waste ink pad.
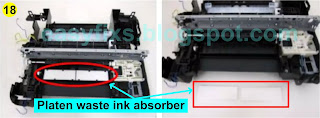
18. Remove the waste ink pad of the lower platen. Separate the waste ink pad of the lower platen.
Disassembly of the printer must be done carefully and after the Main and Platen ink absorber has been replaced, assemble the printer.
2b. Reset the waste ink counter
- The printer is off.
- Press and hold the Stop button.
- Press and hold the ON button (do not release the Stop button.)
- Release the Stop button (do not release the ON button.)
- With the ON button still being held, press the Stop button 5 times.
- When finished pressing the Stop button 5 times, release the ON button, then wait a few moments, the Power LED will flash and finally turn green. If the Power LED turns green (not blinking) it means that the printer has entered Service Mode.
Note
- If the Power LED lights up orange and keeps flashing, it means that the printer failed to enter Service Mode. Turn off the printer then repeat the procedure to enter Service Mode correctly.
- If the procedure for entering Service Mode has been done correctly, and the printer cannot enter Service Mode, repeat the above procedure, and press the Stop button 6 times (enter Service Mode without a scanner.)
- If the procedure for entering Service Mode has been done correctly, and the printer cannot enter Service Mode, repeat the above procedure, and press the Stop button 6 times (enter Service Mode without a scanner.)
Reset the waste ink counter
- If the printer has entered Service Mode, follow the procedure below
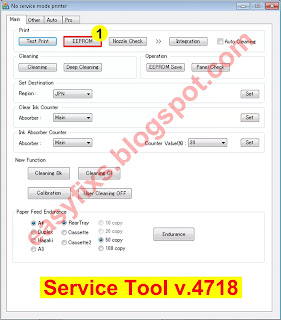
- Download Service Tool v.4718
- Load A4 or Letter paper (5 sheets or more).
- Extract the file, then open Service Tool.
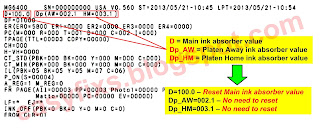
- Print EEPROM (1) information before resetting. Wait a few moments, the printer will print the EEPROM information before resetting. See the value of D (Main ink counter), Dp_AW (Platen Away ink counter), Dp_HM (Platen Home ink counter). If one of the (D / Dp_AW / Dp_HM) has reached the maximum value (100% or 100.0) it means that the waste ink counter must be reset. See the picture below.
- Clear Ink Counter - Absorber: Main (2) - click Set (3) to execute. If the Power LED will flash and a message will appear: "A function was finished" it means the value of D was successfully reset. Wait a while the printer will print the value of D after reset.
- Print EEPROM (1) information after reset. Compare EEPROM data before and after reset.
- If all goes well, close the Service Tool, turn off the printer, wait about 15 seconds, then turn the printer back on. Done.
3. Parts








Post a Comment for "Repair ink absorber full error on Canon MG6600 series, support code 5B00, 5B01, 1700, 1701"